Homemade Bread

Custom made Bread is one of my number one food sources ever. Could you at any point tell by the name of this site?! There truly isn't anything very like a warm cut of new bread presented with a thick pat of spread on top. Mmmmm!
This recipe is great. It's easy to follow, requires around 2 hours to make and yields 2 portions of brilliant bread. It's very adaptable as well, so go ahead and utilize part entire wheat flour assuming you'd like. Brush spread on top when it's out of the stove and to some degree cooled and everybody will much obliged.
Simple Bread recipe made with straightforward fixings and point by point directions telling the best way to make bread! Best natively constructed bread recipe
Stage 1: ASSEMBLE BREAD INGREDIENTS
You'll require warm water, granulated sugar, moment OR dynamic dry yeast, salt, vegetable or canola oil and flour. That is all there is to it!

Stage 2: DISSOLVE THE YEAST AND ACTIVATE IT BY PROOFING
This is a straightforward cycle that requires around 5 minutes. You can see an image beneath what yeast resembles when it's sealed. It's feasible to kill yeast assuming you utilize excessively hot of water, so go for the gold than luke-warm, or around 105°F. Consolidate warm water, yeast and 1 TBSP of the granulated sugar in your blending bowl. Give it a speedy mix and afterward let it sit for 5 minutes. You'll start to see the yeast puff up until it covers the whole surface of the water
Stage 3: ADD REMAINING INGREDIENTS AND MIX
Add the remainder of the sugar, the oil, salt and flour (You can utilize regular baking flour OR bread flour!), then blend utilizing an electric blender until it's very much joined, around 2 minutes. You can blend manually however it will take more time.
Stage 4: KNEAD THE BREAD
You may think, "Stand by! It's now blended!" Ha! Hold on for a moment! Going through the most common way of working bread mixture is vital for bread with incredible surface. Working mixture permits gluten to frame which empowers batter to rise better, be lighter and fluffier. you can ply manually or with a blender. I utilize the mixture snare on my blender and ply for 7 minutes. Assuming that you manipulate manually, you'll need to work for 10-11 minutes, contingent upon how steady you are.

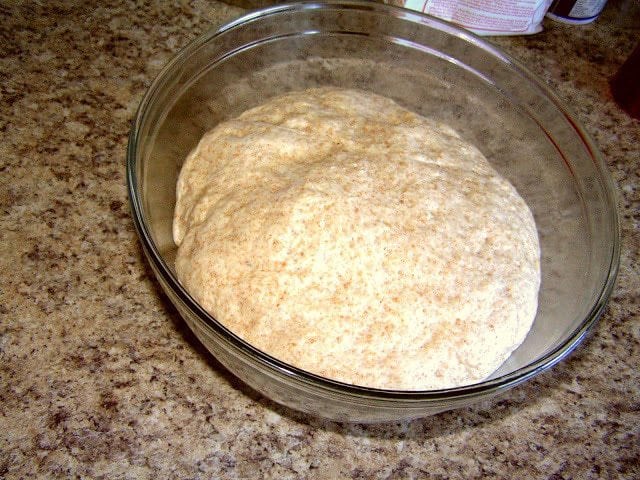
Stage 5: FIRST RISE
Place your wonderful smooth, versatile bread batter in an oiled bowl and cover it with saran wrap or a perfect towel. I think plastic wrap works better since it traps hot air inside and accordingly, my mixture requires a more limited first ascent. Make certain to shower the side of the saran wrap that will contact the batter with oil!
Assuming that your home is cool, your bread will take more time to rise. In the wintertime when my home is cooler than typical, I like to turn the stove on for 2-3 minutes, then switch it off and let the bowl of mixture ascend in there. The broiler traps the intensity for a long-lasting and it's the ideal environment for rising mixture.
Stage 6: PUNCH DOUGH AND SHAPE IT
Punching the batter down rapidly delivers any air pockets that have created and assists your bread with having a more predictable ascent and surface. Shape your batter by moving it delicately into a ball and moving it 2 or multiple times on the ledge with the goal that the ball is more oval. I as a rule punch down and shape the batter rapidly, then place in a lubed bread dish.
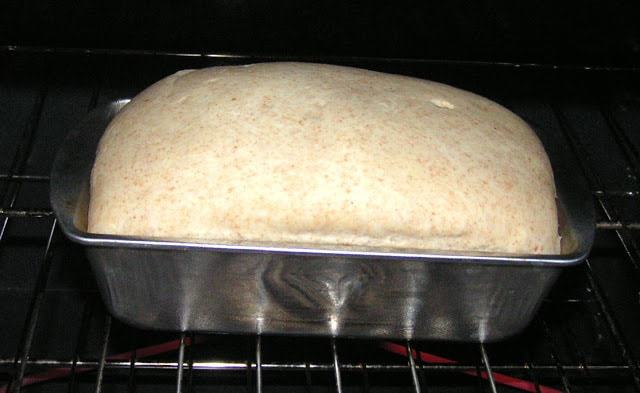
Stage 7: SECOND RISE
I like to do my second ascent in a warm broiler that is not turned on. I turn the broiler on not long before I punch my mixture down, then, at that point, switch it off once I place the batter in the stove for the second ascent. It's truly just on briefly, which is fine! The subsequent ascent will assist with forming your portion of bread and requires around 30 minutes.
Stage 8: BAKE THE BREAD
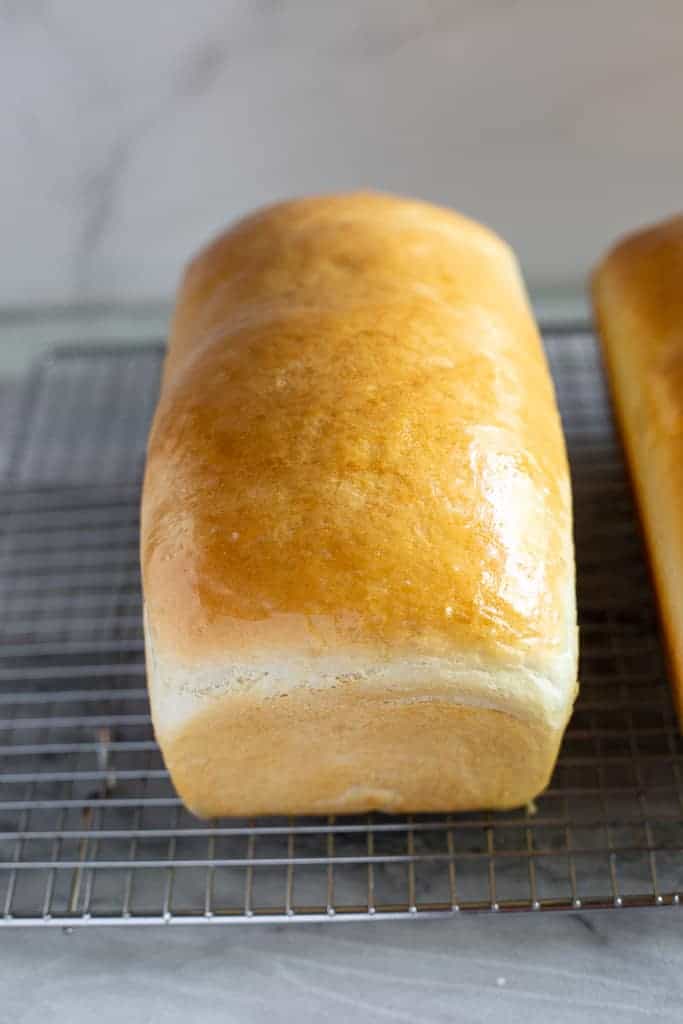
You're almost there! Bread prepares for around 30-40 minutes. You know how I ensure my bread is impeccably cooked? I utilize a computerized cooking thermometer! Completely cooked bread will be 190-200 degrees F. Bread recipes that incorporate milk should cook until 200 degrees, yet since this one doesn't, I take it out once it arrives at 190 degrees. The top will be brilliant brown.
Stage 9: COOL THE BREAD
Cool prepared bread in the prospect 15 minutes, then upset dish and turn portion out onto a cooling rack or collapsed towel to complete the process of cooling. Assuming you leave the bread in the prospect longer than that, you'll steam it, which might make a few pieces of your portion go spongy. Nobody likes saturated bread!
Hand crafted Bread made simple with straightforward fixings and point by point guidelines with photographs. Make our best hand crafted bread recipe and partake in the extraordinary flavor and surface!
HOMEMADE BREAD RECIPE
This is the recipe you ought to follow for making hand crafted bread in the stove:
- 2 cups warm water (110 degrees F/45 degrees C)
- 1/2 cup white sugar
- 1 1/2 tablespoons dynamic dry yeast
- 1 1/2 teaspoons salt
- 1/4 cup vegetable oil
- 5-6 cups flour - You can utilize regular baking flour OR bread flour!
Procedure
In a huge bowl, break up the sugar in warm water and afterward mix in yeast. Permit to evidence until yeast looks like a smooth froth, around 5 minutes.
Blend salt and oil into the yeast. Blend in flour each cup in turn.
Massage mixture for 7 minutes. Place in a very much oiled bowl, and go mixture to cover. Cover with a soggy material. Permit to ascend until multiplied in mass, around 60 minutes.
Punch mixture down. Massage for 1 moment and separation down the middle. Shape into portions and spot into two lubed 9×5 inch portion skillet. Permit to ascend for 30 minutes, or until batter has transcended dish.
Heat at 350 degrees F (175 degrees C) for 30-40 minutes.
Cool, brush with margarine and appreciate!
Stay away from SUNKEN BREAD


Comments
Post a Comment